Rainbow Jello for a Rainbow Party

075

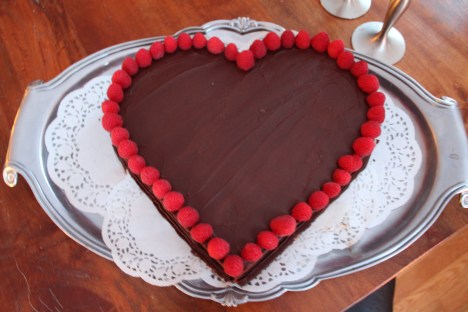
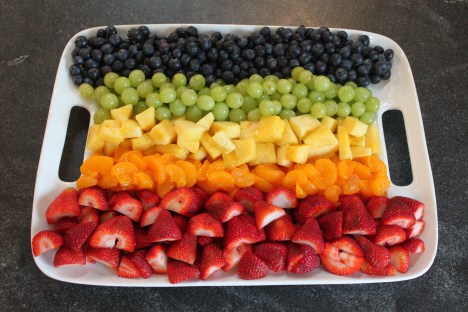
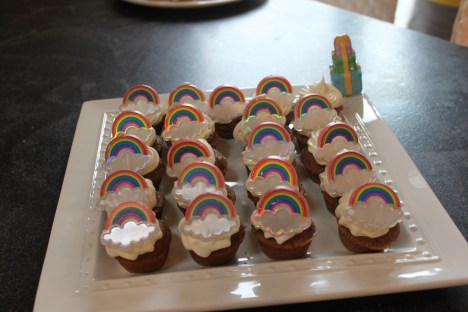
Little girls are growing up mighty quickly in our household. Somehow someway we managed to celebrate two birthdays within the passed few months. How quickly the months and years are passing! I’d be lying, however, if I said I don’t love to plan a party. And a party with a good old theme is what gets me especially giddy. For my little one we did a rainbow theme in the spring. Pinterest became my best friend because more than ANYONE Pinterest LOVES a rainbow theme party. (If you don’t believe me, check for yourself!)

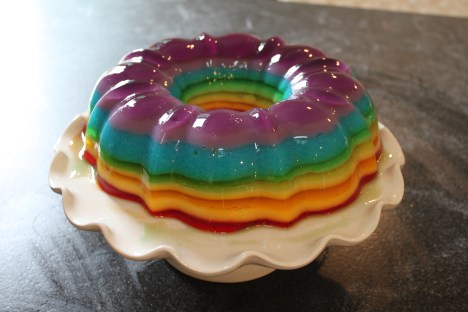
Together my girls and I tackled this Rainbow Jello mold. If you plan to make this, choose a day when you will be home for several hours. While there isn’t significant hands on time required, there is substantial waiting time required between each step.  The final product looked so pretty on the table and the kids couldn’t wait to get their hands on it! And it tasted delicious!

Rainbow Jello Mold:

7  3 oz. packages of flavored gelatin

  • 1 purple
  • 1 blue
  • 1 green
  • 1 yellow
  • 1 orange
  •  2 red
  • 1 1/2 cups vanilla yogurt
  • 8 3/4 cup boiling water

First, empty your packages of gelatin powder into 6 separate containers.  The containers need to be able to hold at least 1 1/4 cups of hot liquid. You will need a bigger bowl for the red one as you will be using two boxes of that one.

Next, stir 1 1/4 cups boiling water into each flavor (2 1/2 cups for the red). Stir each until gelatin is completely dissolved. You will want to position your glasses in opposite order of the rainbow as we will start with purple and end on red.

Spray your bundt pan with cooking spray, this will help the Jello mold release easily once it is set. Once you have done that you can start adding colors.

Add 3/4 cup of your purple gelatin into the bundt pan and then place in the refrigerator for 15 minutes. Make sure you set a timer for each layer as knowing when to add the next layer is important.  You must chill each layer long enough to partially set, but not too long otherwise the next layer will not stick.

Take the remaining purple gelatin and add 1 1/2 Tablespoons of the yogurt and stir until completely dissolved.  Make sure there are no yogurt lumps.  Place this mixture into the refrigerator to chill until your first 15 minutes is up.

Once your timer goes off, take your bundt pan and yogurt mixture out of the refrigerator.  You will first want to test the gelatin in the pan to make sure it is set enough to take the next layer.  You will test this by lightly touching the jello with a finger tip and lifting up right away.

The jello should stick to your finger and leave a slight impression in the jello.  If you have that, then you are ready to add your next layer.

Now you want to add your yogurt mixture. With a spoon very gently and slowly add your yogurt mixture to the set jello layer. Make sure your spoon is low when you add the yogurt mixture.  This will ensure you don’t break through the bottom layer when you pour it in.

Continue until all of the yogurt mixture is added.  Place back into the refrigerator for another 15 minutes.

Complete this same process with the rest of the gelatin colors.  Red will be your last layer, which will be a double layer. Use 1 1/2 cups of the liquid jello for the clear layer and 1 cup mixed with 4 Tablespoons yogurt for the creamy layer.

The other jello colors can remain on the counter during this entire process.

I have never had any of the waiting jello start to set.  If this should happen though, simply fill a bowl with hot water and place your jello container inside of the water bowl and stir until the set jello loosens up and turns back into liquid.

Your cooling time will lessen with each layer added as the cooler the jello gets, the less time it takes to set.  Also, each layer gets thinner and thinner so will chill quicker.  So each layer might not take the entire 15 minutes.  When I get to the green layer I start checking around 10-12 minutes and adjust accordingly.

Once you have added all 12 layers, let the filled mold set overnight.

When you are ready to release the mold, simply fill your sink with warm (not hot) water. The water should cover the majority of the bundt pan, but should not come all the way to the top.  You do not want any water to get into the jello mold.

Let your mold sit in the warm water for about 10-15 seconds.  You will see the side of the jello get a little shiny and liquefy slightly.  That is a good sign that the jello has separated from the mold.

Once you see that, take your mold out of the water and dry off the pan.  Take the plate that you will be serving the jello on (should be flat and at least 2-3 inches wider than your mold) and sprinkle a couple drops of water around where the jello will be touching the plate.  This will allow the jello to adjust and spread a little once it is released. Now place the lightly moistened plate over the jello mold.  With a good grip on the mold and plate, flip the plate and mold over.  Slowly lift your mold and the jello should release easily.  If any water has accumulated on the plate around the jello, simply take a paper towel and wipe until clean and dry.

Recipe found here on Glitter and Goulash.


064067

Chocolate Heart Cake with Ganache

038

Happy Valentine’s Day, friends! It sure is a cold one here in the Northeast! All the better for snuggling, I suppose. 🙂

Today I bring you a heart-shaped chocolate cake topped with thick fudgy ganache and raspberries. Pinterest takes all the credit here. This cake is created by pouring batter into one 8 inch square pan  and one 8 inch round pan then baking and slicing the round cake in half. See below.

026

I used this oldie but goodie chocolate cake recipe which originates from Annie’s Eats. I then slathered on thick fudgy ganache (made using this recipe). Top with raspberries (little kid fingers are especially helpful here) and enjoy!

Wishing you lots of love and chocolate on this cold Valentine’s Day!

035

Gingerbread Cupcakes

044

Happy New Year! Hard to believe we are already THREE weeks in to 2016. I have no idea how that happened. It’s almost every day that I think, “Man, I wish I had a pause button.” The time seems to FLY by these days. Anyone else feel that way?

So rewinding…. I was charged with making a few desserts for Christmas Eve this year. Dinner is a sit down affair for 32 (that’s not a typo: THIRTY TWO) people. Baked stuffed lobster, linguini with anchovy sauce, fried scallops, and stuffed calamari are just  a few of the delicacies my mom prepares. Dessert is typically on the lighter side. Easy bites people can pick up and nibble on while sipping homemade lemoncello are best.

While cruising around Pinterest I found these adorable looking cupcakes. The mini Wilton sugar gingerbread men that Sally’s Baking Addiction  put on top of her cupcakes are adorable. I ran around to all of our local craft stores and could not find them. These cute little trees had to work–and they did! I love the winter wonderland-y effect they have when perched on top of the thick cream cheese frosting. These cupcakes were moist and satisfying and would be a tasty addition to any winter dinner.

041

Gingerbread Cupcakes:

  • 1/2 cup butter, room temp
  • 1/2 cup dark brown sugar
  • 1 egg
  • 1/2 cup milk
  • 1/2 cup molasses
  • 1 teaspoon vanilla extract
  • 1 and 1/3 cups flour
  • 1/2 teaspoon baking powder
  • 1/2 teaspoon baking soda
  • 1/4 teaspoon salt
  • 1 teaspoon ground cinnamon
  • 1/2 teaspoon ground ginger
  • 1/2 teaspoon nutmeg
  • 1/4 teaspoon ground allspice


Cream Cheese Frosting

  • 8 oz cream cheese, room temp
  • 1/4 cup butter, room temp
  • 2 cups powdered sugar
  • 1-2 Tablespoons milk
  • 1 teaspoon vanilla extract

Cupcakes

Preheat oven to 350 F. Line a muffin tin with cupcake liners.  In a large bowl using a  stand mixer fitted with a paddle attachment, beat the butter and brown sugar together on medium speed until creamy. Beat in the egg until combined, scraping down the sides and bottom of the bowl as needed. Beat in the milk, molasses, and vanilla on. Mixture will look slightly curdled.

In a medium bowl whisk together the flour, baking powder, baking soda, salt, cinnamon, ginger, nutmeg, and allspice. With the mixer running on low, slowly pour the dry ingredients into the wet ingredients. Mix until just combined. Scrape down the sides and bottom of the bowl as needed.

Fill cupcake liners 2/3 of the way full. Bake for 19-21 minutes or until a toothpick inserted in the center comes out clean. Allow to cool completely before frosting.

Frosting

In a medium bowl using a stand mixer beat the cream cheese and butter together on until smooth. Add the powdered sugar and 1 tablespoon of milk. Beat for 2 minutes. Add the vanilla and 1 more tablespoon of milk if needed to thin out. Beat for 1 minute.

Frost cooled cupcakes immediately before serving. Decorate with sprinkles of cinnamon and your choice of candy.


Recipe credit: Sally’s Baking Addiction


043

Apple Tart

Remember back in the day when I used to make tarts all of the time?

Well, I was asked to make an apple dessert for Thanksgiving and I wanted to step outside of the apple pie box. I contemplated making an apple tart for Rosh Hashanah and decided on apple cake instead, so for Thanksgiving I determined it was time for a tart!

This tart was well-received. My dad actually thought it was purchased from a bakery when he saw it on the dessert table. (That is always the best compliment, isn’t it?)

This recipe follows my standard tart formula: crust + filling + fruit + glaze. It is easy to make and yields a beautiful and delicious tart. Enjoy!

Apple Tart:

Filling

  • 3 Granny Smith apples
  • 3 tablespoons unsalted butter, divided
  • 1/4 – 1/2 cup (50 – 100 grams) granulated white sugar, divided
  • 1/2 teaspoon cinnamon, divided
  • Confectioners’ Sugar for browning the top of the tart.
  • 1 1/2 cups chunky apple sauce (you can definitely use home made if you prefer)

Crust

  • 2 cups graham cracker crumbs
  • 1/4 cup sugar
  • 1/4 tsp salt
  • 1/3 cup melted butter
  • 1 teaspoon vanilla extract

Glaze

  • 1/2 cup apricot preserves
  • 1 tablespoon Water

Make the Crust

Preheat oven to 350 F. In a large mixing bowl, combine all crust ingredients and stir with a fork until mixture is moist, like wet sand. Pour into a well-buttered 9- or 10-inch tart pan and press into an even layer, going up the sides of the tart. Bake for 12-14 minutes, until crust is just starting to brown at the edges. Cool completely.

Make the filling

Peel, core, and cut the apples into slices 1/4 inch thick. Melt 1 tablespoon butter in a large skillet over medium heat and stir in the other 2 – 4 tablespoons sugar and 1/4 teaspoon cinnamon. Add the apples and saute until they begin to soften, approximately 5 minutes. Set the cooked apples aside.

Assemble

Spoon the apple sauce into the cooled crust.

Arrange the cooked apple slices in concentric circles over the applesauce, and brush with 1 – 2 tablespoons melted butter. Sprinkle with confectioner’s sugar. Broil it under a preheated broiler about 4 inches from the heat until the edges of the apples are golden brown and crisp.

Make the Glaze

In a small saucepan, heat the apricot preserves until boiling. Remove from heat and strain to get rid of lumps. Add the water. Use this glaze to seal the baked tart shell and to brush the top of the finished tart.
Recipe inspired from this one found here on The Joy of Baking.

Pumpkin Cupcakes


Pumpkin cupcakes! Perfect for Halloween and Thanksgiving. Hope everyone is enjoying this wonderful season!

Pumpkin Cupcakes recipe found here: http://smittenkitchen.com/blog/2008/11/pumpkin-cupcakes/

P.S. I hope One-Pie never changes their can label. I love the nostalgia it evokes and choose it over Libby’s every time because of it!