Tarts are one of the most beautiful and versatile desserts. There are so many options when it comes to making a tart and the end result (a lovely classic that transports well) is worth the effort.
In most cases tarts are comprised of three (and a half) components. By altering the choices you make for each component you can create a wide variety of flavors and textures. In other words, the possibilities really are endless. The components can be adapted for any season or occasion!
THE COMPONENTS:
(1) Crust, sometimes called the shell
Tart crust recipes can really run the gamut. From your grandmother’s recipe for pate brise/pate sucre (pie crust) to simply tossing together any type of finely crushed cookie with melted butter, to using ground toasted nuts, there are many options that work well.
Examples of different crust types:
Banana Pudding Tart— Nilla wafer cookie crust
Raspberry Chocolate Tart— biscotti cookie crust
Plum Macadamia Nut Tart— macadamia nut crust
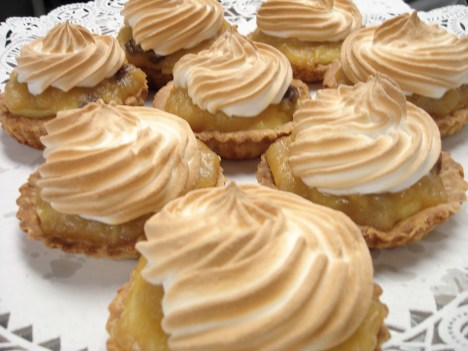
Apple and Meringue Tartlets— traditional pate sucre (pie crust)
(2) Filling
You will often see pastry cream or a simple custard as a tart filling. However, while those might be the most common, there is no reason not to be adventurous! Chocolate pudding, chocolate ganache, whipped cream, lemon curd, and almond paste all work well and provide a nice canvas for the layering of interesting flavors. For some tarts, the fruit (often stewed with sugar and other spices) serves as the filling. Again, the options are endless.
(3) Fruit
The fruit is what makes a tart so beautiful. In other words, the fruit is the icing on the cake! (Hahaha…excuse the dorky baker’s joke!) The fruit you choose and how you position it on the tart will determine the tone of the tart. Piles of sliced cinnamon and sugar-soaked apples will say rustic. Daintily arranged delicate fruit like raspberries and blueberries will say elegant. A cafe near my office sells fruit tarts brimming with every berry you can imagine. To me it says I am fresh and delicious. All say eat me!
Decide what you want the tone of your tart to be prior to arranging the fruit and then just go for it. I think this certainly falls under the category of “the more the merrier.” Need inspiration? Let the season guide you by selecting fruits that are bountiful simultaneously (think pears and figs) or that are contrasting or complementary in color (aren’t peaches and raspberries so pretty together?!).
(3.5) Glaze
Don’t forget to dress your fruit! Simply heat some apricot or seedless raspberry preserves in a saucepan over medium heat and brush across your fruit. Don’t glob it on; a simple sweep of the pastry brush will suffice. It is well worth the extra few minutes. It will give your tart that polished look that says “somebody loves me.”
While this is a very simplistic overview, note that tarts bear endless potential. (I haven’t been saying that over and over for nothing!) And that is exactly my point for writing this! Don’t be afraid to try fresh combinations of fillings and exotic fruit and nuts. Mix and match recipes for new and exciting flavors! Have fun!
Fresh Fruit Tart:
(pictured above)
crust
- 2 cups Nilla wafers, crushed into fine crumbs
- 1/4 cup sugar
- 1/4 tsp salt
- 1/3 cup melted butter
- 1 teaspoon vanilla extract
Preheat oven to 350 F.
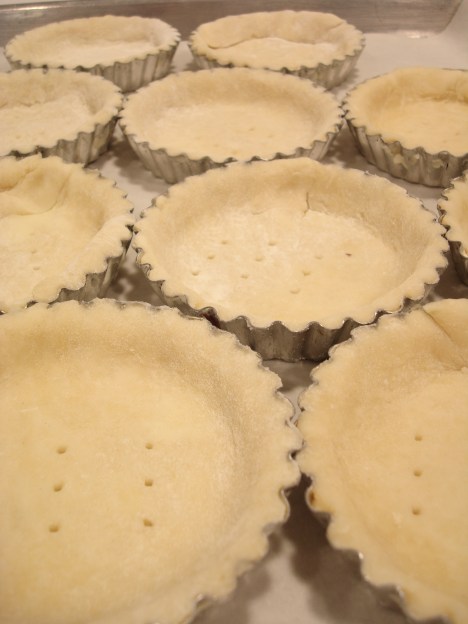
In a large mixing bowl, combine all crust ingredients and stir with a fork until mixture is moist, like wet sand. Pour into a well-buttered 9- or 10-inch tart pan and press into an even layer, going up the sides of the tart.
Bake for 12-14 minutes, until crust is just starting to brown at the edges. Cool completely.
filling
1 tablespoon butter
2 cups milk
2 cups light cream
1/2 cup sugar
3 1/2 tablespoons cornstarch
6 eggs
1 tablespoon vanilla extractIn a saucepan bring the butter, milk, and light cream to a boil. While this mixture is cooking, combine the sugar, cornstarch, and eggs in a bowl and whip using a whisk.
When the cream/ milk/butter mixture reaches the boiling point, whisk in the egg mixture and cook to boiling. Stir constantly with a wooden spoon. Be sure to scrape the bottom of the pan to prevent it from burning. As it begins to thicken, clumps may form. Use a whisk to smooth it out. Boil for 1 minute. Use a rubber spatula to press the pastry cream through a strainer into a bowl. Whisk in vanilla extract. Cover the surface with plastic wrap touching the pudding. (This prevents a film from forming.) Chill overnight if possible, or for at least a few hours.
assemble
- fresh fruit (kiwi slices, raspberries, and halved strawberries work well)
- 1/2 cup apricot preserves
Spread filling into cooled crust. Arrange fruit on top. Melt preserves in a saucepan and lightly brush over fruit.
Filed under: cookies, Dessert, pudding, raspberry, tart | 9 Comments »


 processor, blender, or