Magnolia’s Vanilla Cupcakes with Vanilla Buttercream

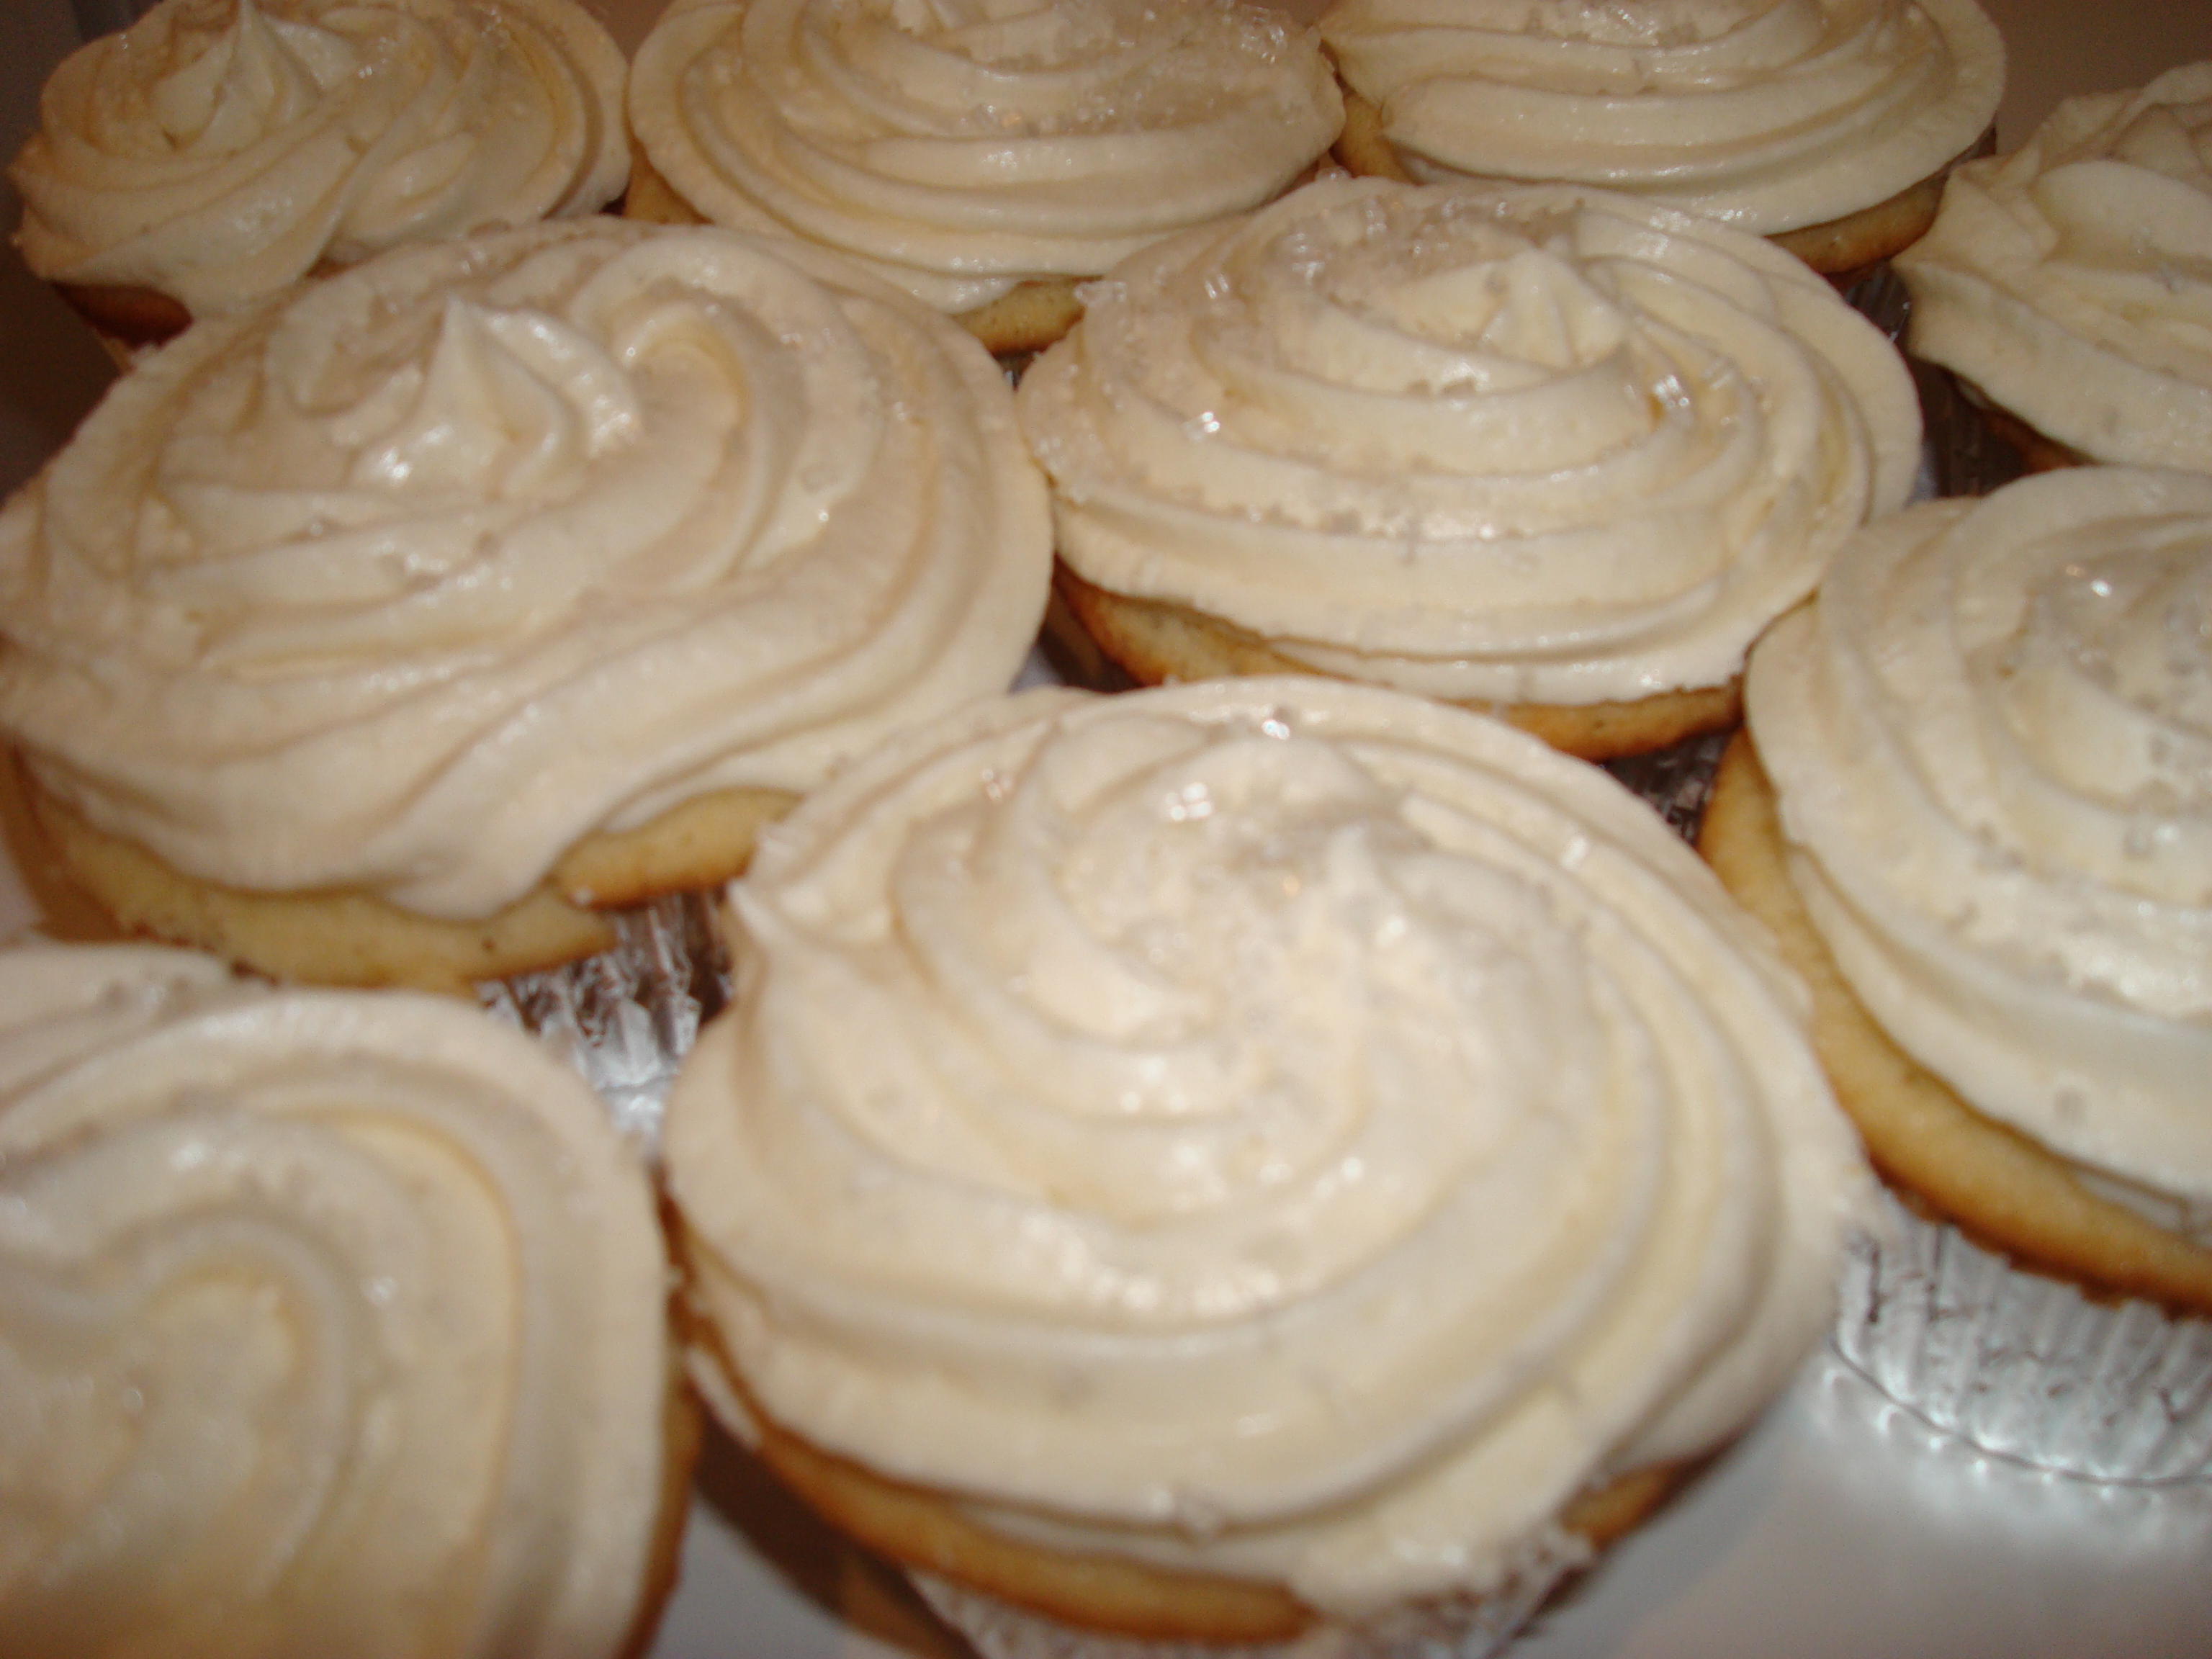
The Magnolia Bakery in New York City is known for its cupcakes.  The bakery has received much acclaim and several appearances in pop culture.  (A Sex and the City episode is the first that comes to mind!) Though I have never been in the bakery (though I did walk by once and the line was out the door!) I figured I could trust the simple vanilla on vanilla recipe.  Boy were these delicious!  The cake light was fluffy, with a nice vanilla flavor.  The frosting was so sweet and creamy!  However, if you don’t have a sweet tooth, I warn you against these! 

Magnolia’s Vanilla Cupcakes:

  • 1 1/2 cups self-rising flour*
  • 1 1/4 cups all purpose flour
  • 2 sticks butter (softened)
  • 2 cups suger
  • 4 eggs (at room temp)
  • 1 cup milk
  • 1 teaspoon vanilla extract

Preheat oven to 350 degrees.

In a small bowl combine the flours and set aside.

In a large bowl use an electric mixer to cream the butter until smooth.  Gradually add the sugar  and beat until fluffy. Add the eggs, 1 at a time, beating well after each addition. Add the dry ingredients in 3 parts, alternating with the milk and vanilla. With each addition, beat until the ingredients are incorporated. Spoon the batter into the cupcake liners, filling them about 3/4 full. Bake for 20 minutes.

Magnolia’s Vanilla “Buttercream”:

  • 2 sticks unsalted butter (softened)
  • 1 box of confectioners’ sugar
  • 1/4 cup milk
  • 2 teaspoons vanilla extract

Place the butter in a large mixing bowl. Add the sugar and then the milk and vanilla.  Beat with an electric mixer until smooth and creamy, about 3 to 5 minutes until the icing is thick enough to be piped.  After frosting these cupcakes I sprinkled some clear sugar crystals on top of each.

*I am told self-rising flour can be purchased, however, when I did not see it at my local grocery store I went ahead and made it myself without much trouble.  The standard rule is for every one cup of self-rising flour your recipe calls for add 1 1/2 teaspoons baking powder + 1/2 teaspoon of salt to 1 cup of all purpose flour and sift. 

Recipe adapted from Magnolia’s Vanilla Cupcake and Buttercream recipe found here on foodnetwork.com

Lemon Cupcakes with Lemon Icing


I was set on making fruit-flavored cupcakes and I hemmed and hawed over which fruit flavor for longer than anyone should hem and haw about fruit-flavored cupcakes, or anything fruit-related for that matter.  I considered orange, lime, pineapple, apple, watermelon and even grape.  I even considered different combinations of frosting and cake–lemon cake with lime frosting, orange cake with lemon frosting, vanilla cake with pineapple frosting.  I think the heat was getting to me–I almost forgot I do have more important things to think about!   Before spiralling too far into a fruit-salad hysteria I took a cold shower.  It was then that I settled on crisp, simple, refreshing: lemon.  And I am happy with the decision.  The cake was nice and fluffy with just the right amount of lemon flavor.  The icing was smooth and sweet–nicely balanced by the tartness of the lemon.    


Lemon Cupcakes:

  • 2 sticks unsalted butter
  • 2 cups granulated sugar
  • 4 large eggs, at room temperature
  • 3 cups all-purpose flour
  • 1/2 teaspoon baking soda
  • 1/2 teaspoon salt
  • 1 cup milk
  • lemon zest of 2 lemons
  • lemon juice of 2 lemons

Preheat over to 325 degrees.  Insert liners into 2 cupcake pans.  In a large bowl cream together butter and sugar with an electric mixer until fluffy, about 3 minutes.  Add the eggs one at a time to creamed mixture, beating 1 minute after each addition.

In a separate bowl combine flour, baking soda, and salt.

Add the dry ingredients to the creamed mixure, alternating with the milk.  Add the lemon zest and lemon juice.  Mix until incorporated.

Fill the cupcake liners 3/4 full.  Bake for 20 minutes or until a toothpick inserted in the center of a cupcake comes out clean.

Lemon Icing:

  • 4 cups confectioners’ sugar
  • 1 stick unsalted butter (softened)
  • zest of one lemon
  • juice of one lemon

In a large bowl cream together sugar and butter with an electric mixer until smooth.  Mix in the lemon zest and lemon juice.  Spread over cooled cupcakes. 

Lemon cupcake recipe and lemon icing recipe adapted from Crazy About Cupcakes by Krystina Castella.

Irish Cream Cupcakes with Milk Chocolate Glaze

 I would not be honest if I didn’t tell you I was in quite a rush when I made these cupcakes!  They were a last minute decision and I made them using ingredients already in my cupboards.  Nonetheless, I think they came out pretty well.  The Irish Cream flavor was strong but not overbearing.  Next time I think I will try frosting with a vanilla buttercream instead of the chocolate glaze, but time was not on my side (that seems to be a theme on this blog!) and I went with a simple chocolate glaze. 

I think these would be great for St. Patty’s day, especially with some shamrock embelishments.   

Irish Cream Cupcakes:

  • 2/3 cup unsalted butter at room temperature (I used salted)
  • 2 cups sugar
  • 2 large eggs at room temperature
  • 2 teaspoons vanilla extract
  • 2/3 cup milk
  • 1 1/3 cups Irish Cream Liquor (I used Bailey’s)
  • 4 cups of flour
  • 2 tsp salt
  • 2 tsp baking powder

Preheat oven to 325 degrees.  Insert liners into cupcake pan.  In a large bowl cream together sugar and butter.  Add the vanilla and eggs.  Beat well.  In another bowl, mix together flour, baking powder and salt.  In a third bowl mix Irish Cream with milk.  Add the flour mixture to the creamed mixture alternating with the liquid mixture, starting and ending with the flour mixture. Beat on medium speed for two minutes.  Fill the cupcake papers 3/4 full.  Bake for about 20 minutes.  Cool cupcakes in pan.  Makes 24 cupcakes.

Milk Chocolate Glaze:

  • whipping cream
  • coarsely chopped milk chocolate*

Heat the whipping cream until it is bubbling but not boiling.  Remove it from the stove and add the chopped up chocolate.  Whisk cream and chocolate together.  Add more cream or chocolate to reach desired consistency.  After the cupcakes cooled I drizzled the glaze over each.

*I was low on milk chocolate chips so I used a solid Godiva chocolate bunny that I have been holding on to!  Talk about improvising–haha!  I did feel bad watching his paws melt, but there was no time to run to the store!

Irish Cream Cupcakes adapted from Crazy about Cupcakes by Krystina Castella

Milk Chocolate Glaze adapted from Cupcakes! by Elinor Klivans

Peanut Butter Cupcakes with Milk Chocolate Glaze


I am bringing these to a coookout tomorrow night.  They look and smell delicious–my only complaint is the recipe only makes 12!  I wish I had realized this before I began baking because 12 turns into 11 mighty quickly with a husband in the house.  He “tested” one pre-glaze and said it was good–nice and peanutbuttery.  I hope the glaze holds up until tomorrow, as it is warm out.  I may even toss them in the fridge! Even if it does melt a bit, the combination of PB and chocolate (melted or not) is a classic that few don’t appreciate! 

Peanut Butter Cupcakes:

  •  1 cup unbleached all-purpose flour
  • 1 teaspoon baking powder
  • 6 tablespoons butter (recipe calls for unsalted, I used salted)
  • 3/4 cups smooth peanut butter at room temp.
  • 1 cup packed dark brown sugar
  • 1 large egg
  • 1 teaspoon vanilla extract
  • 1/2 cup milk

Preheat the oven to 350.

Sift the flour, baking powder, and salt in a medium bowl.  In a large bowl on medium speed beat butter, peaut butter, and brown sugar until smooth–about 1 minute.  Mix in the egg.  Add the vanilla and beat for another minute.  On low speed, add the flour mixture in 3 parts and the milk in 2 parts.  Start and finish with the flour mixture.  Make sure the flour is incorporated and the batter is smooth.  It will stay the color of peanut butter as below. 

Line 12 muffin tin cups with liners.  I used foil liners because I like the look of them.  Fill each liner with about 1/4 cup of batter.  I use an ice cream scoop (I got this idea from Ina Garten).  It makes distributing the batter easier and you are more likely to distribute evenly. I also find it helpful to place the muffin tin on top of a cookie sheet before placing in the oven.   

Bake about 22-27 minutes.  The tops will be firm, light brown, and there are a few small cracks on the top.  As usual, a toothpick inserted to the middle should come out clean. 


Cool for 10 minutes in the pan set upon a wire rack.  Then remove the cupcakes from the pan and cool completely on a wire rack. 

 Milk Chocolate Glaze:

  • 1/4 cup whipping cream
  • 1 tablespoon salted butter (recipe calls for unsalted, I used salted)
  • 1 cup milk chocolate chips
  • 1/2 teaspoon vanilla extract

In a medium sauce pan heat the cream and better over low heat until the cream is hot and the butter melts.  Do not boil.  Remove from heat add the milk chocolate chips and let sit in the cream for about 30 seconds.  Add the vanilla and whisk until smooth and all chocolate chips have melted. 

Using a small spatula, spread 1 tablespoon of the glaze over the top of each cupcake.  (Make sure cupcakes are completely cooled or the glaze will simply melt and drip off!)

The cupcakes can be covered and stored at room temp for up to three days.

Adapted from Cupcakes! by Elinor Klivans. Chronicle Books.

Root Beer Iced Vanilla Cake

My dad loooooves root beer, so for his birthday I wanted to honor his favorite treat.  In addition to serving A&W root beer floats, I decided to make a root beer iced cake.  I confess I used a boxed mix for the vanilla cake because I wanted to spend more time on the decorating, and I was short on time as it was.  So I baked a double vanilla sheet cake and spent the rest of my energy on the decorating!  Little did I know how much energy it would take!  In the end it was all worth it and my dad loooooved his root beer iced cake.  (As did everyone else at the dinner party!)

Root beer Icing (the recipe actually calls it frosting, but I found the consistency to be much more like icing):

  • 1 3/4 cups confectioner’s sugar
  • 1/4 cup unsalted butter at room temp
  • 1/2 teaspoon vanilla extract
  • 6 tablespoons root beer

Gradually add the confectioners’ sugar to butter until well mixed.  Add the vanilla and root beer.  Add more root beer or confectioners’ sugar until you reach the desired spreading consistency.

I made the mistake of adding too much liquid and therefore had to run to the store mid-mixing to get more sugar.  Then I added too much sugar and had to add more liquid.  I went back and forth like this for a bit until I had as much as a needed at the correct consistency!  It ended up a nice light beige color.

I wanted to crush root beer barrels and sprinkle those on top–at this point little I did I know how much trouble I would have (a) finding root beer barrels and (b) crushing them.  After running around to several stores I finally found them at CVS.  They are quite a bit harder than I expected and crushing them with a meat tenderizer in a plastic bag was not an easy task.  The barrels were the consitency of marbles and when smashed, the sharp pieces poked holes in the bag allowing root beer dust to pour out and create a lovely sticky mess! I eventually did end up with enough crushed barrels to sprinkle on the top of the cake.  I then lined the edge of the cake with piped plain vanilla frosting, just to finish it off.  I also topped it off with some really cute gummy cola bottles. As I said, in the end it worked out well and this cake was a huge hit!

Icing/frosting recipe adapted from Crazy About Cupcakes by Krystina Castella.